30DoP Part III

Posted: May 22, 2012 in Uncategorized

Here we have a nice and simple model.  This is one of the gretchin crew of the battlewagon with the supa kannon.  I’ve had the wagon itself pretty much finished for a while, I’ve just been procrastinating on the crew models.  I figure they will make for a few easy models when I don’t have a lot of painting time.  So you will probably 2 more of these as this goes on.

The skin is different from my normal ork skin.  This time I used knarlok green highlighted with vallejo surface primer german yellow.

Hope you enjoy!

30DoP Part II

Posted: May 21, 2012 in Uncategorized

I thought I had bitten off a bit more than I could chew deciding to tackle this model in a day.  We could argue semantics about it being monday and not sunday but, I’m not gonna worry about 42 minutes or so.  Over all I’m happy with him.  I’m still figuring out how to paint white properly which is why I didn’t apply it to the helmet.  That and I kinda like the metal look on the helmet.  On the upside I’m fantastically pleased with how the reds came out.

Anyways, after a good 6 or so hours of work on this mini today, I think I’m going to go with something a little easier tomorrow since I won’t have as much time.  Enjoy!

P.S.  Sorry for the terrible lighting.  Late at night and I don’t feel like setting up my studio lights.

30 days of paint!

Posted: May 19, 2012 in Uncategorized

So I’ve noticed a ton of people on different social media sites doing their 30 days of ______.  Ranging from 30 days of sketches or photos to 30 days of your favorite ponies.  So I decided I am going to take a stab at this with 30 days of paint.  Rules, for 30 days I have to try to paint something everyday and post the results.  Ok, I’m editing these rules a bit.   What it will actually be is I will paint every day I don’t have work taking up the brunt of my day.  Kind of hard to paint something when I only have like 2 hours free.  The point being there will be 30 figures painted and they will each be painted in a day.

Today I start with an old metal chaplain model.  I never was a big fan of this model and I picked it up in a sort of trade from a friend.  I had no intentions of doing anything with it for a while, but I figured it would go well with my spacesharks army so tada!  It took about a total of 4 and a half hours to paint this thing from prime to finish.

We’ll see how long I can keep this up/afford this.  I have my next ten models lined up after this, I’m not sure what to do when they run out.

Stompa follow up

Posted: April 21, 2012 in Uncategorized

I’d apologize for the delay but I’m not too worried anyone is following this blog with any regularity yet but if you are, heres the paint explanation so far for the stompa.

Normally I would prime the whole model with GW Chaos black primer, but this time I only used the GW primer on the Forgeworld head.  The reason for this was because base color I used for the stompa was Vallejo Surface Primer UK Bronze Green.  On the plastic Vallejo Surface Primer (which I will now call VSP for the rest of this demo) is fantastic.  On the resin it doesn’t grip as well as the spray can primer and rubs off even after scrubbing the resin clean multiple times.

So I based the whole thing with the Uk bronze green and then added some white VSP to give my first round of highlights to the model.   This was modulated further with VSP German Dark yellow.

I used VSP German Red Brown to break up the solid color and to paint the exhausts to start them for a nice rust color, and then finished off the airbrushing by spraying the ork idols, glyphs and teeth with VSP white.

As you can see from this entry that you can use the wide range of VSP’s to do more than just prime your model.

Hopefully I will continue on this project on a regular basis.  It might be slightly delayed as I just got a ton of new goodies from Forgeworld and I like many hobbyists have a hard time completing something without starting on something new.

Stompa and other projects

Posted: April 18, 2012 in Uncategorized

Like many hobbyist’s, I currently am working on a wide variety of projects.  I figured I’d post a few shots of things that should be upcoming in the finished work section.

The stompa will be an on going work in progress, the other two will probably not warrant their own posts.

As I’m am posting this right before I have to head out to work, I apologize for the terrible lighting, and I’ll add a full explanation on the stompa painting a little later.  Till then, enjoy.

Finished Imp Guard

Posted: April 4, 2012 in Uncategorized

So I realize I’ve been lacking in the post department for roughly a month but, I have good reason.  Well, I have a reason.  I’ve spent the last month working on a commission project.  I realise that I could have taken work in progress shots and commented or posted on those but, well, no excuses on that one.  Some times I just get too caught up in something.

Anyways, here is a taste of what the project looks like, more shots in the finished work gallery.

Finished Kill Blasta

Posted: February 26, 2012 in Uncategorized

After a few final touches including adding some flames and extra weathering the Kill blasta is complete!

This was a blast to work on (pun not initially intended) and I recommend this kit to anyone who collects orks, or just wants a fun large kit to work on.

Here are the final shots.  Enjoy.

Kill Blasta Part 2

Posted: February 18, 2012 in Uncategorized

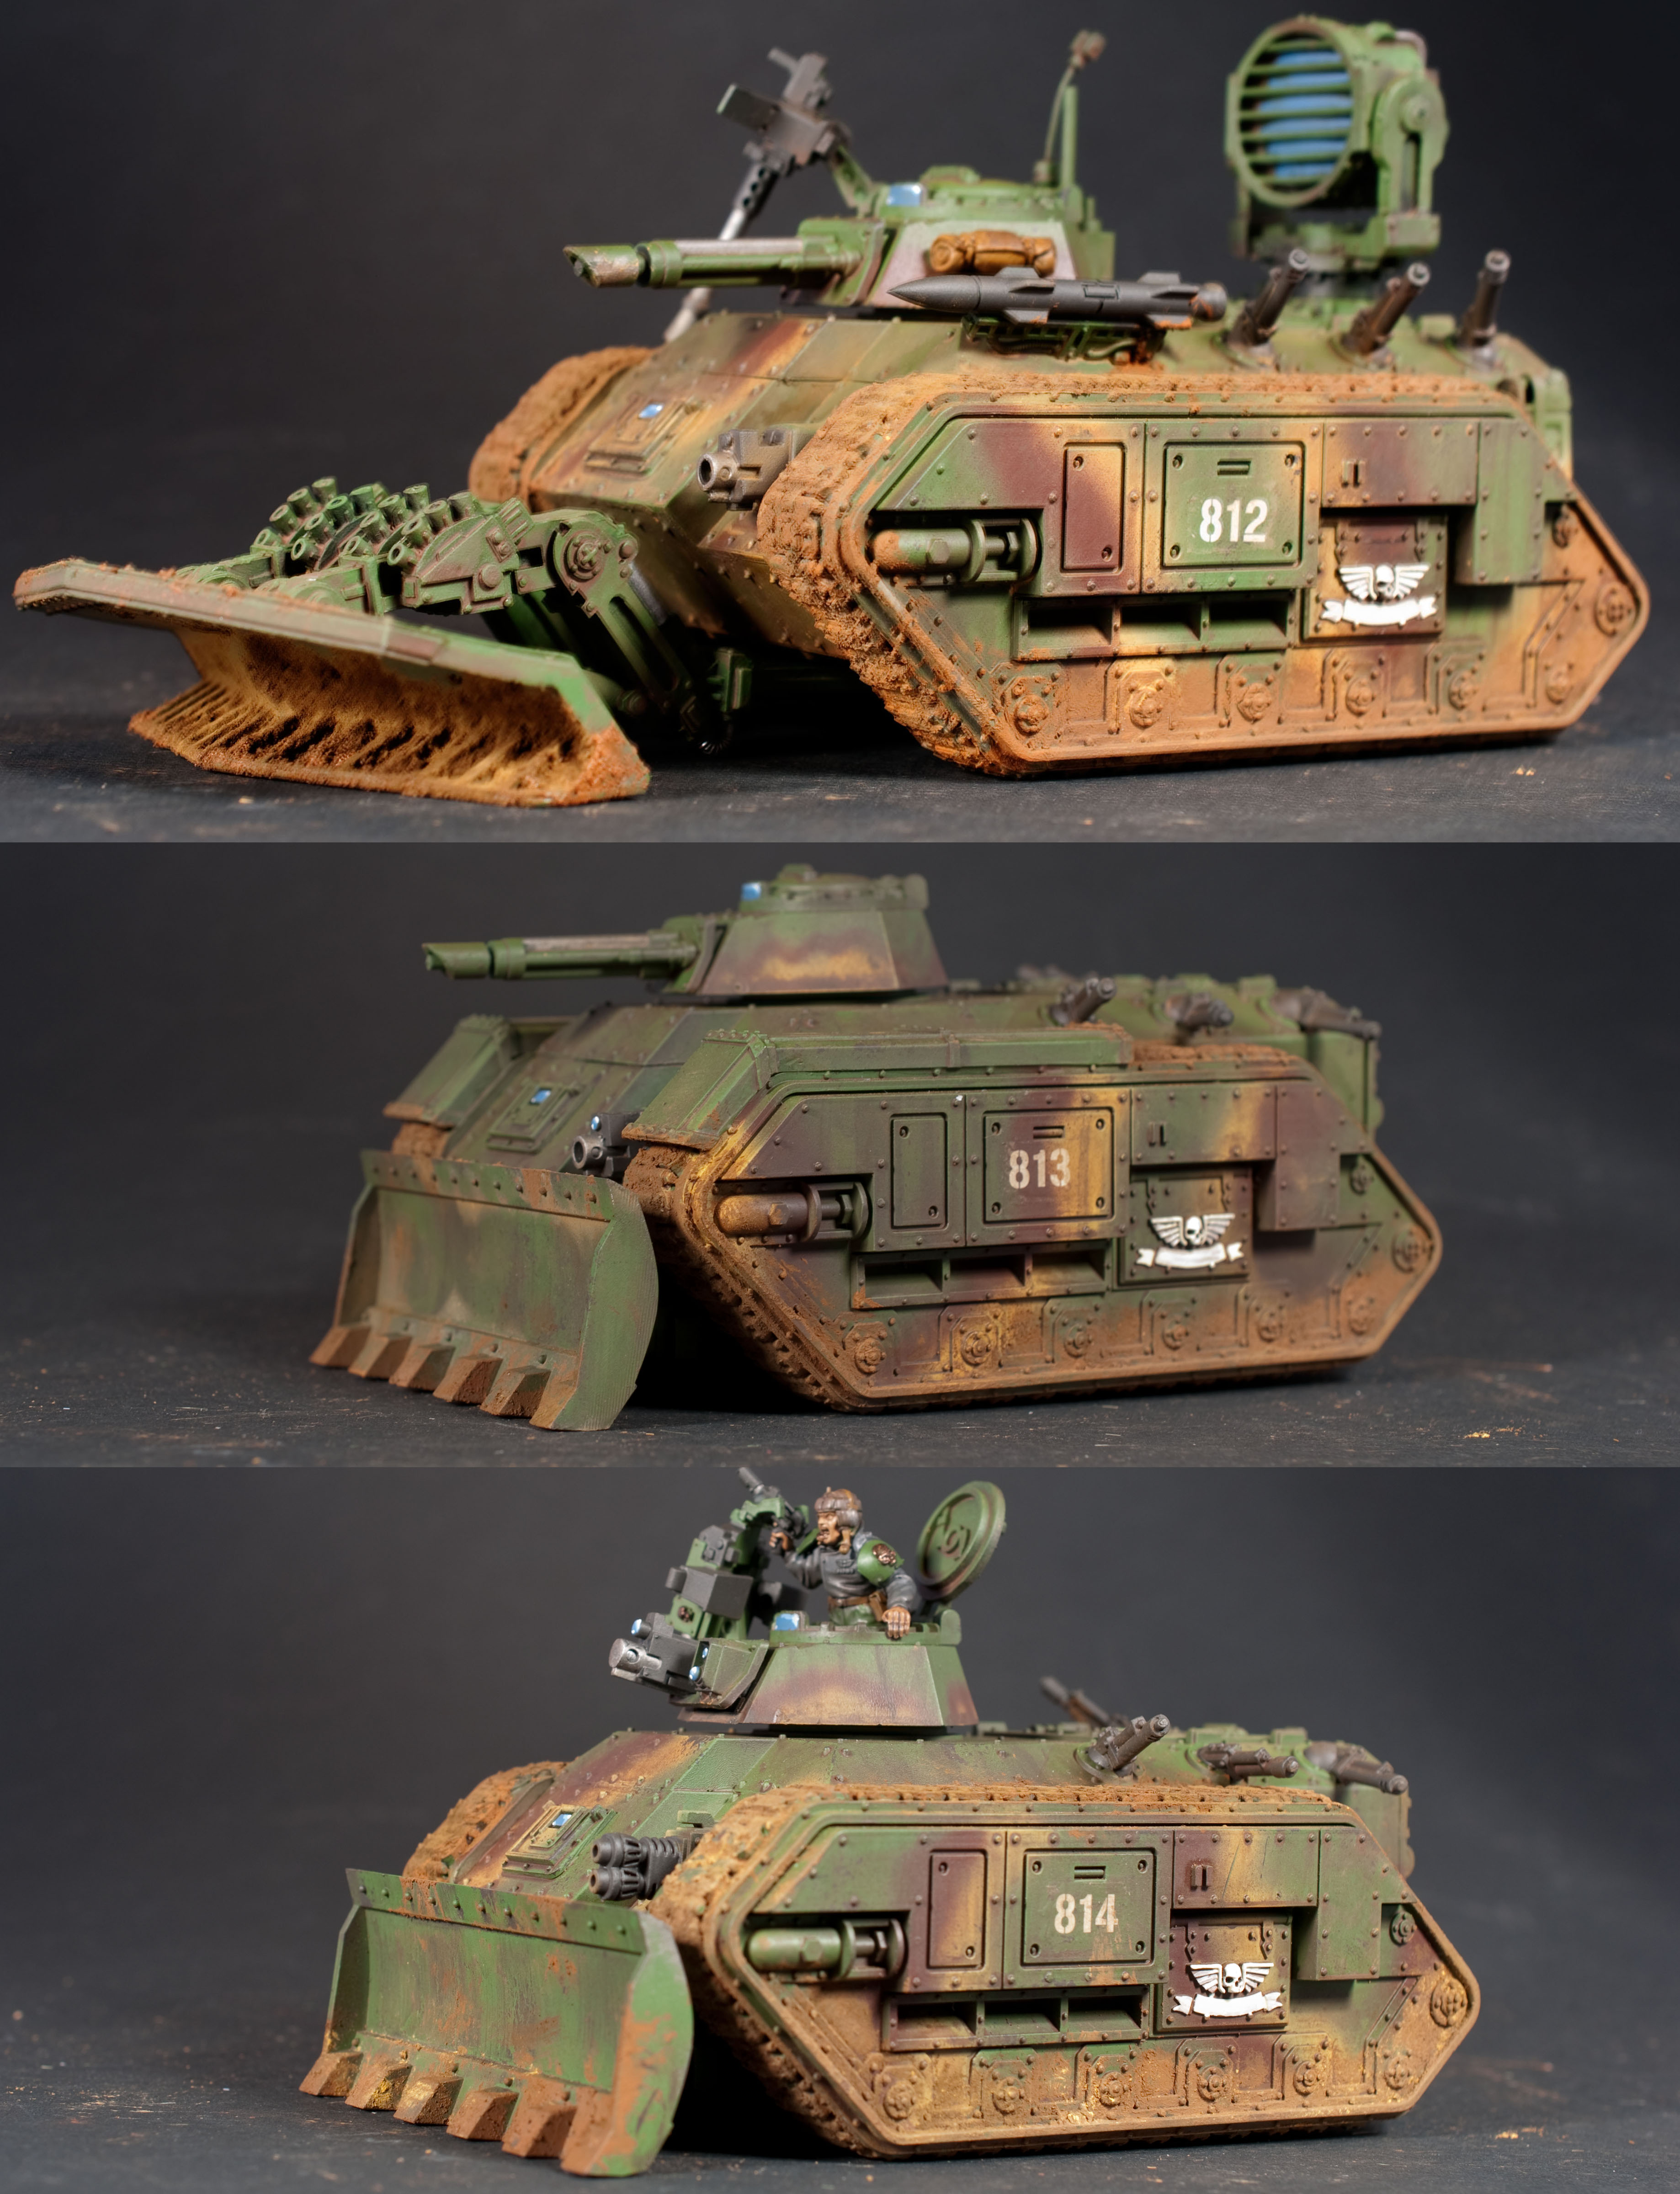
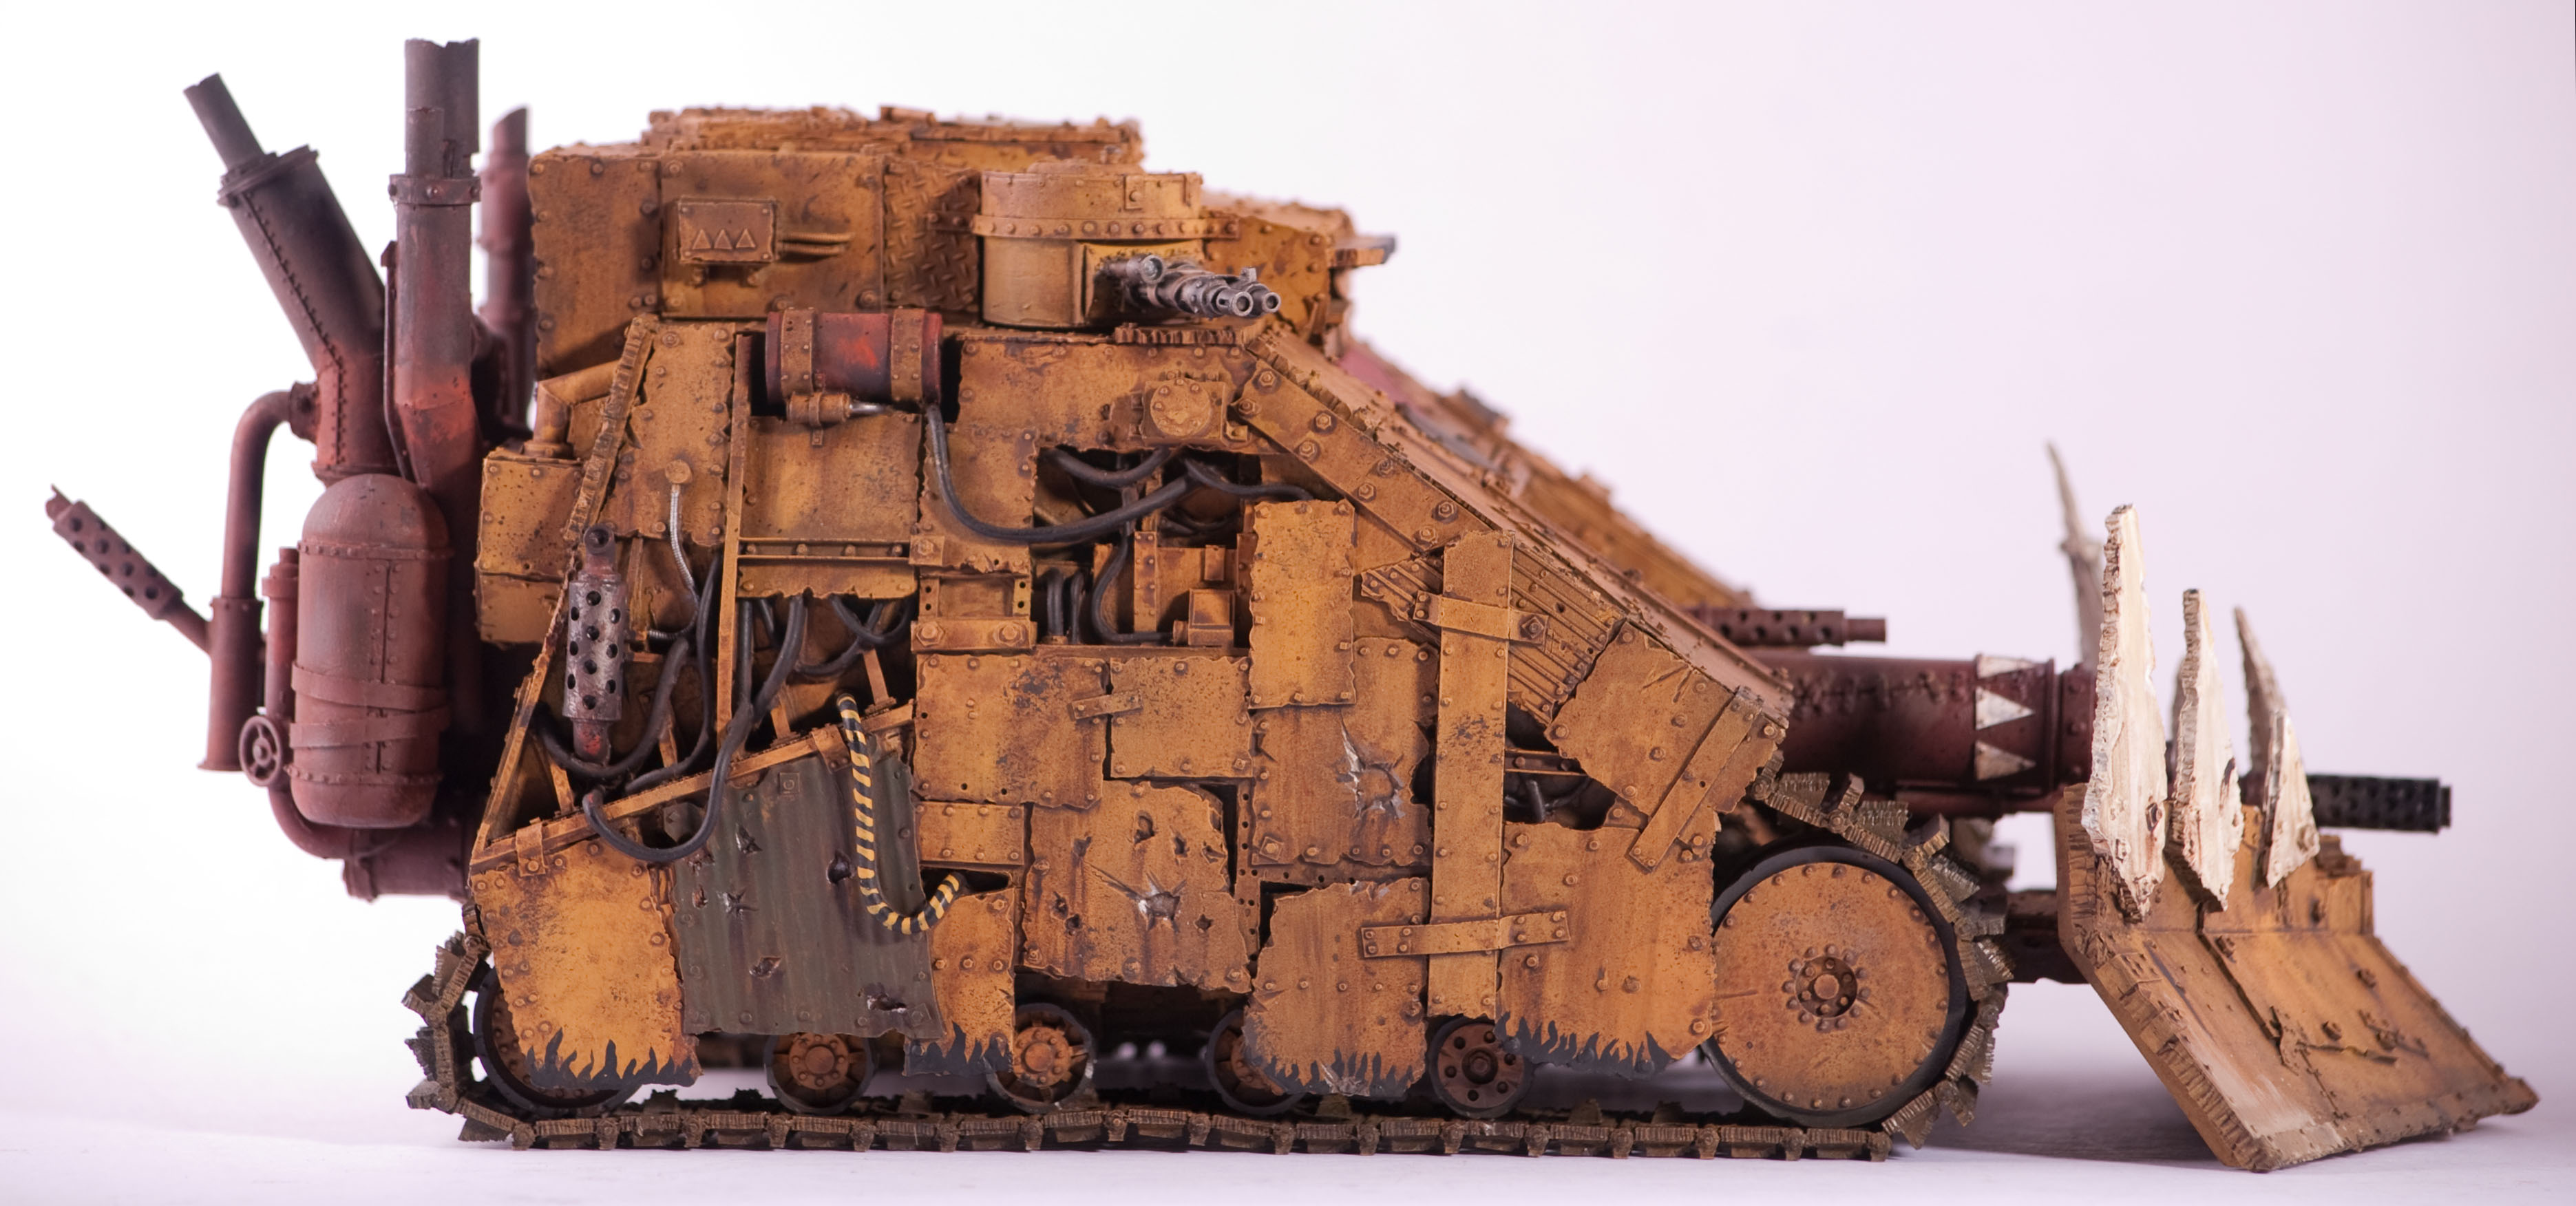
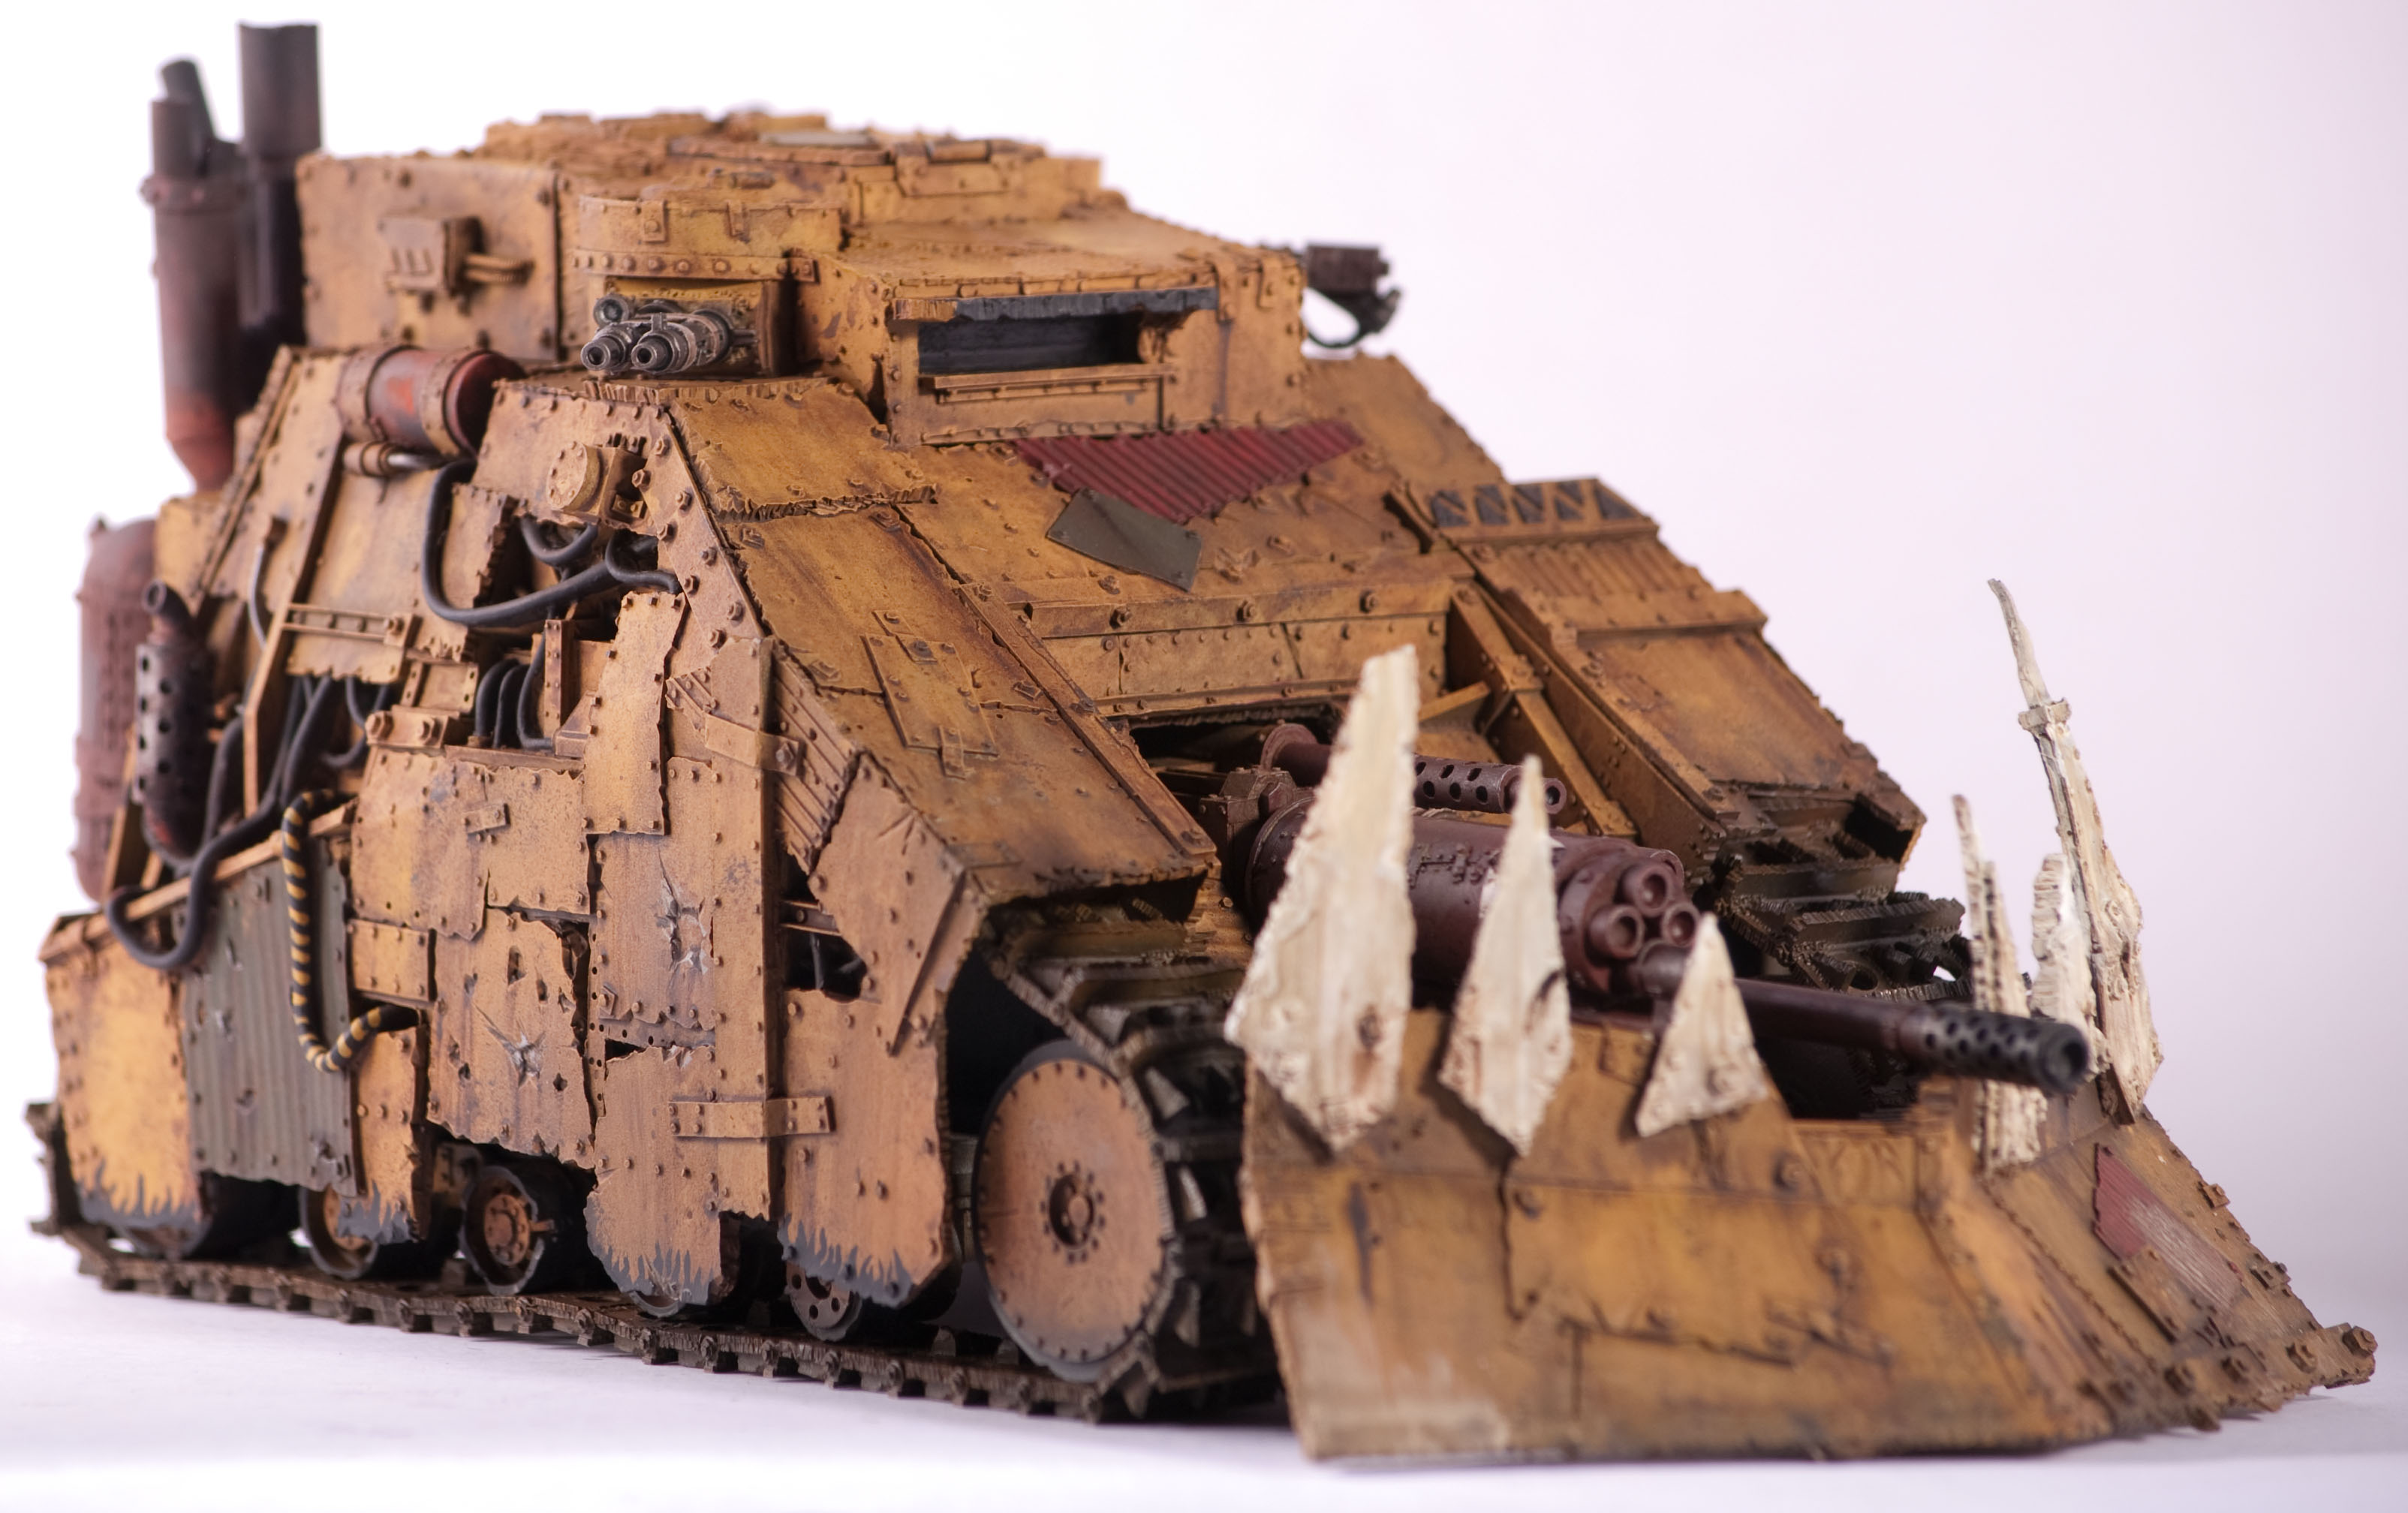
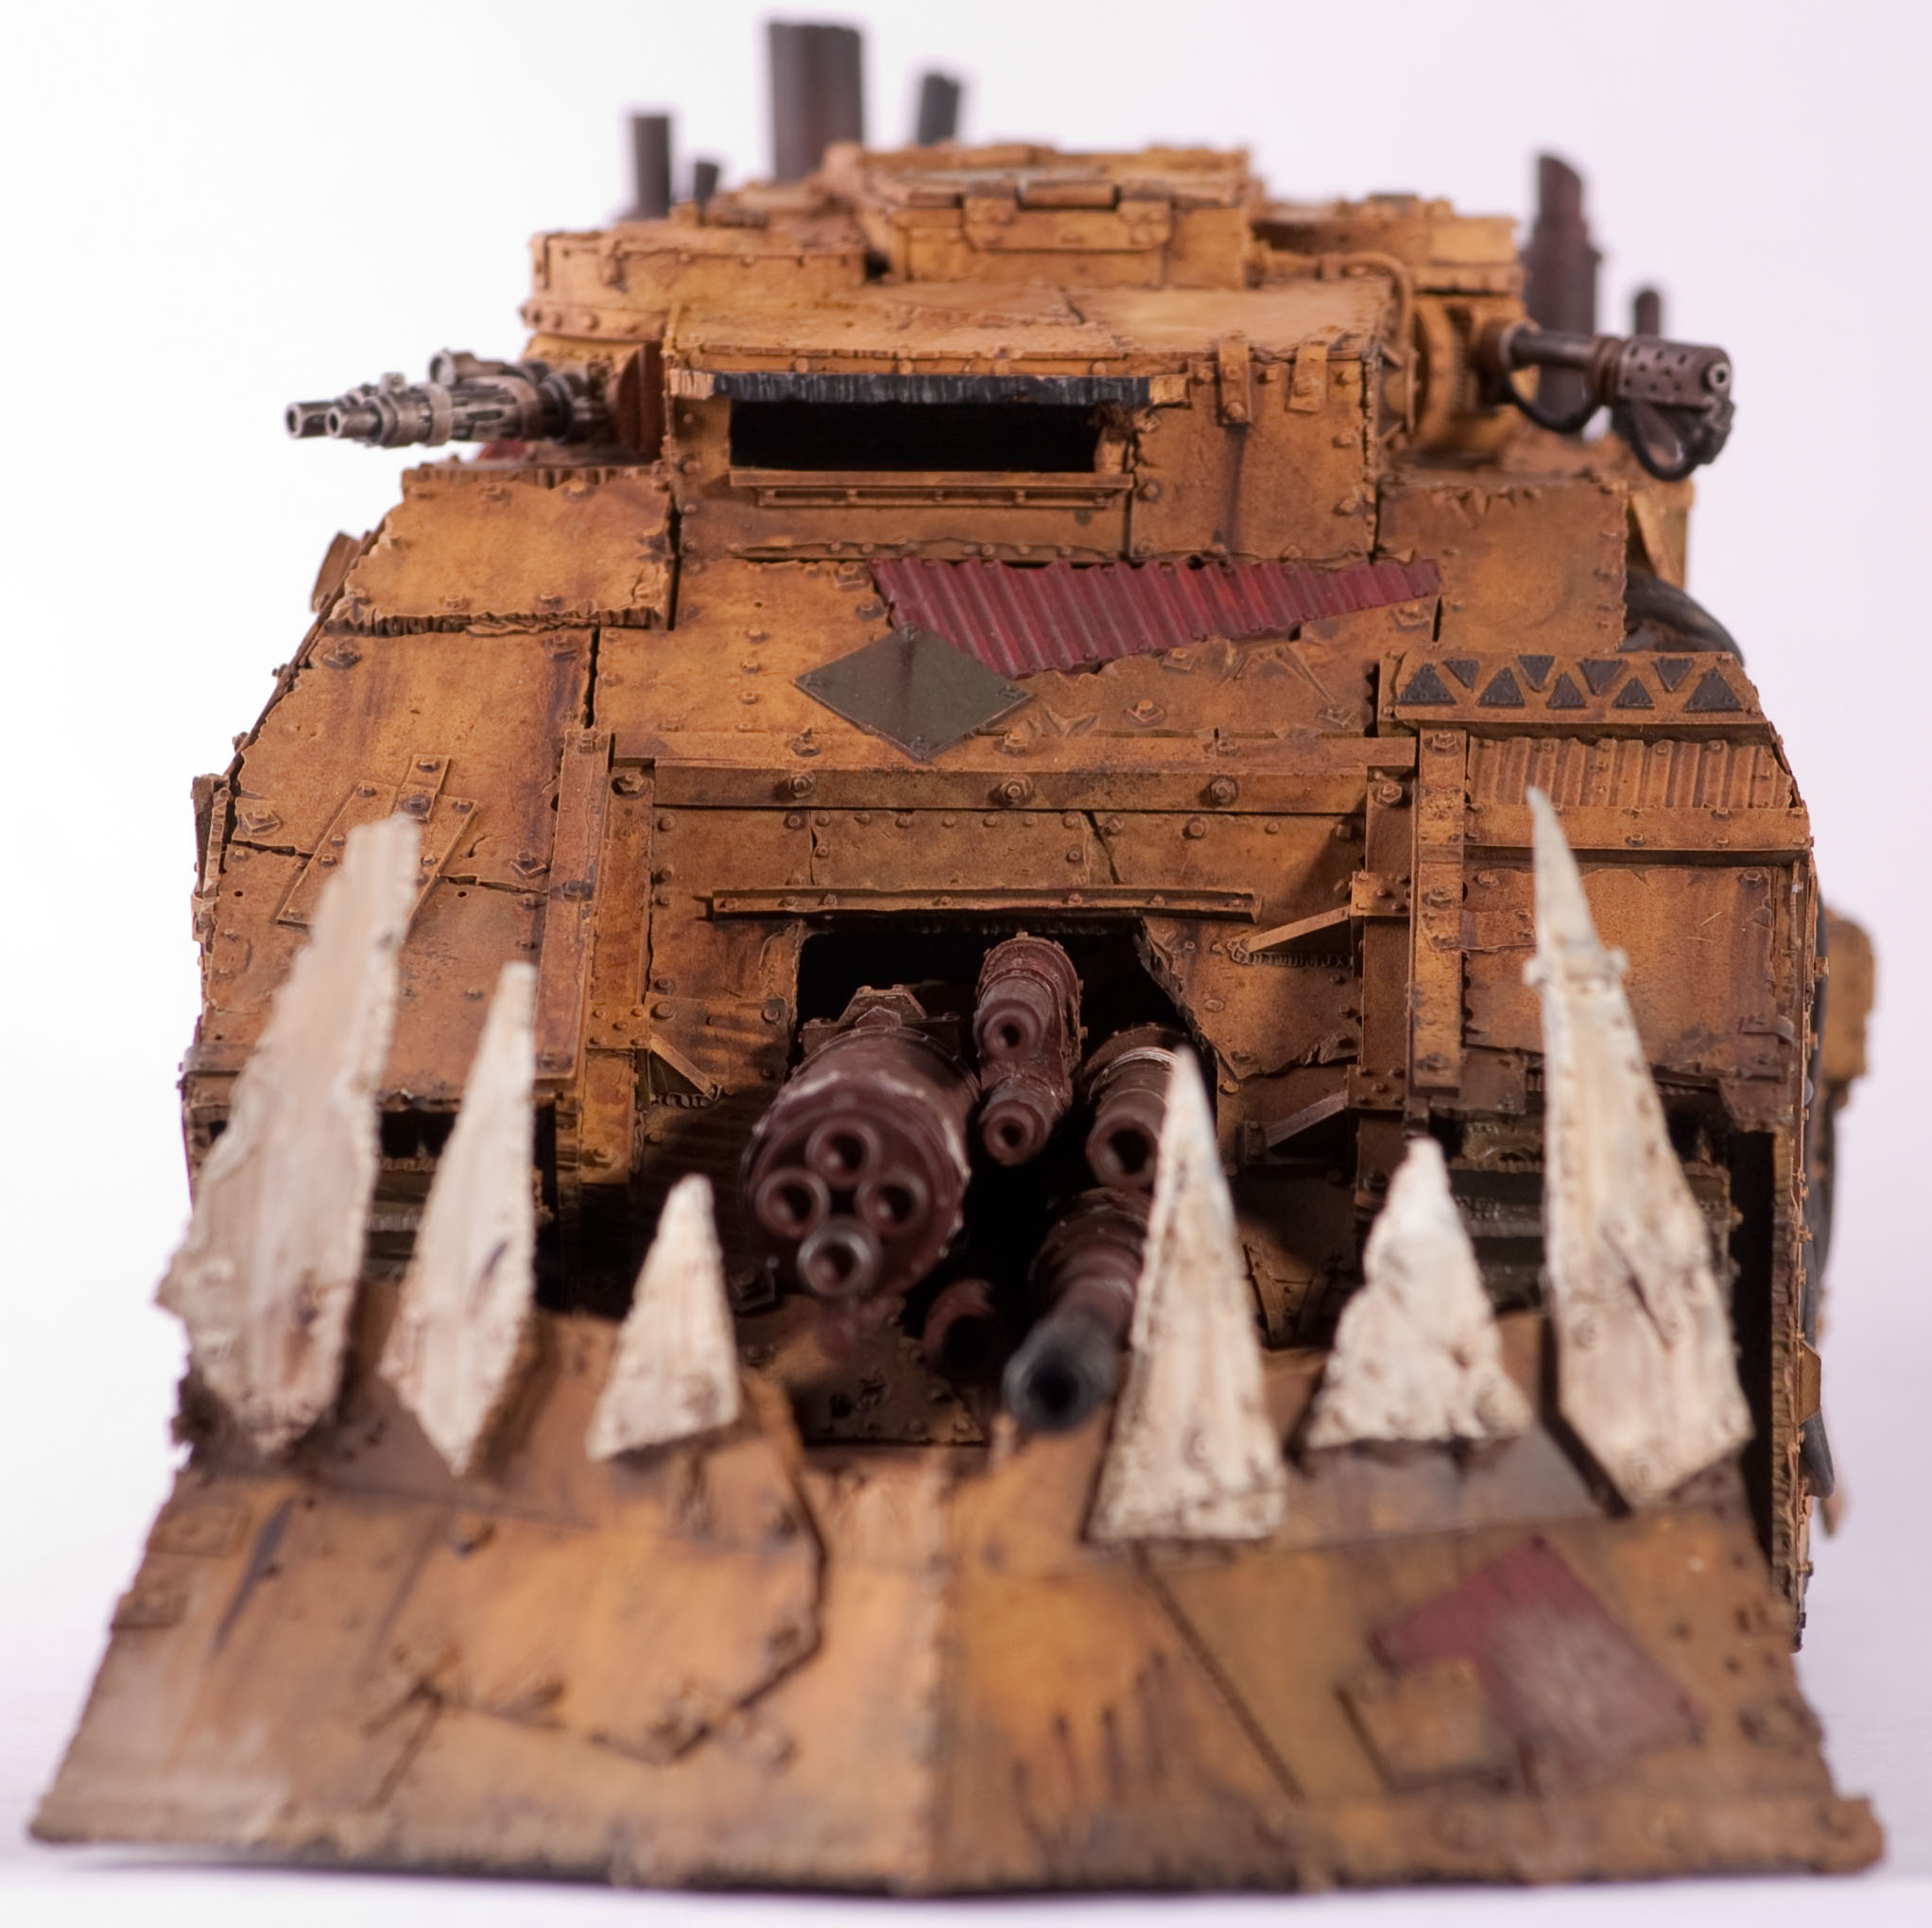
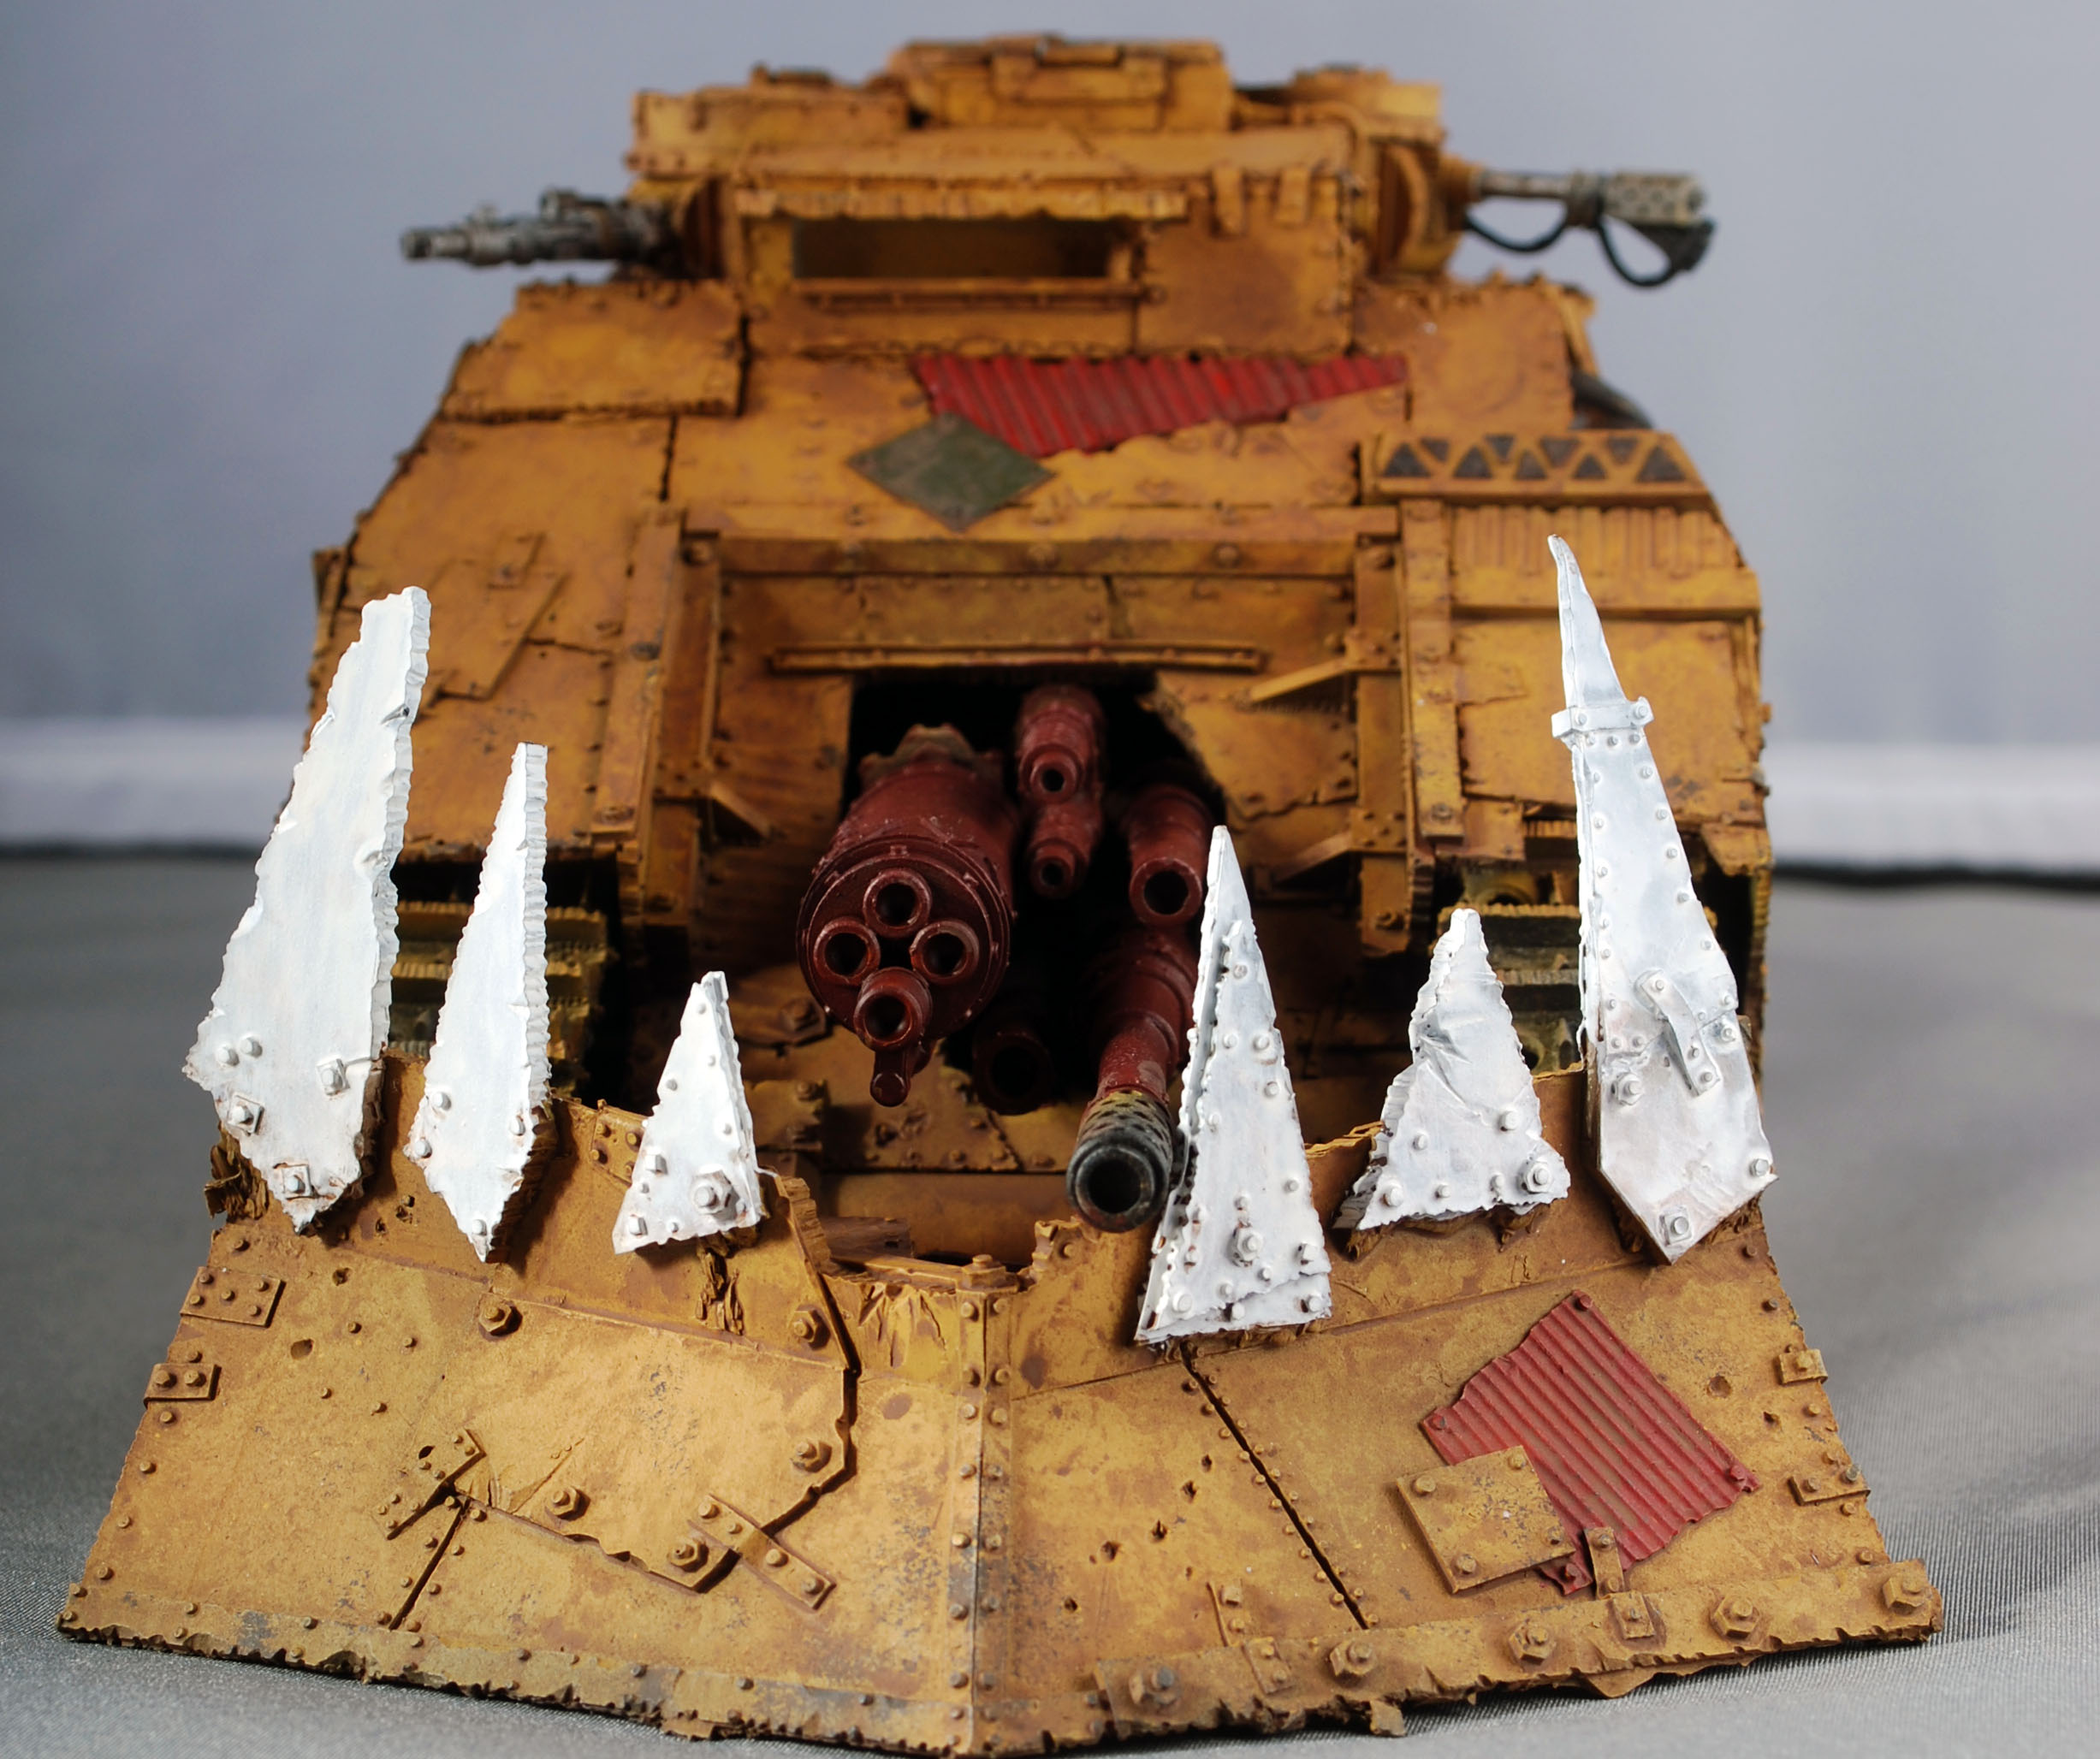
Alright, so as I said, I would be onto some of the details and weathering in this update.  The first thing I did was try to break up the yellow of the model by adding some other color panels on the tank.  I choose to use reds and greens because they compliment the yellow nicely.  Using a sponge I dabbed on chardon granite to simulate paint chipping.  I then painted all the hosing with model masters Aircraft Interior black for now, though I may go back and change some of them up for visual interest.

The last step before weathering of course was to seal the whole vehicle with Testors Dull coat.  This is because for the weathering we will be using enamels and if you don’t protect the acrylic base coat it can eat away at it.

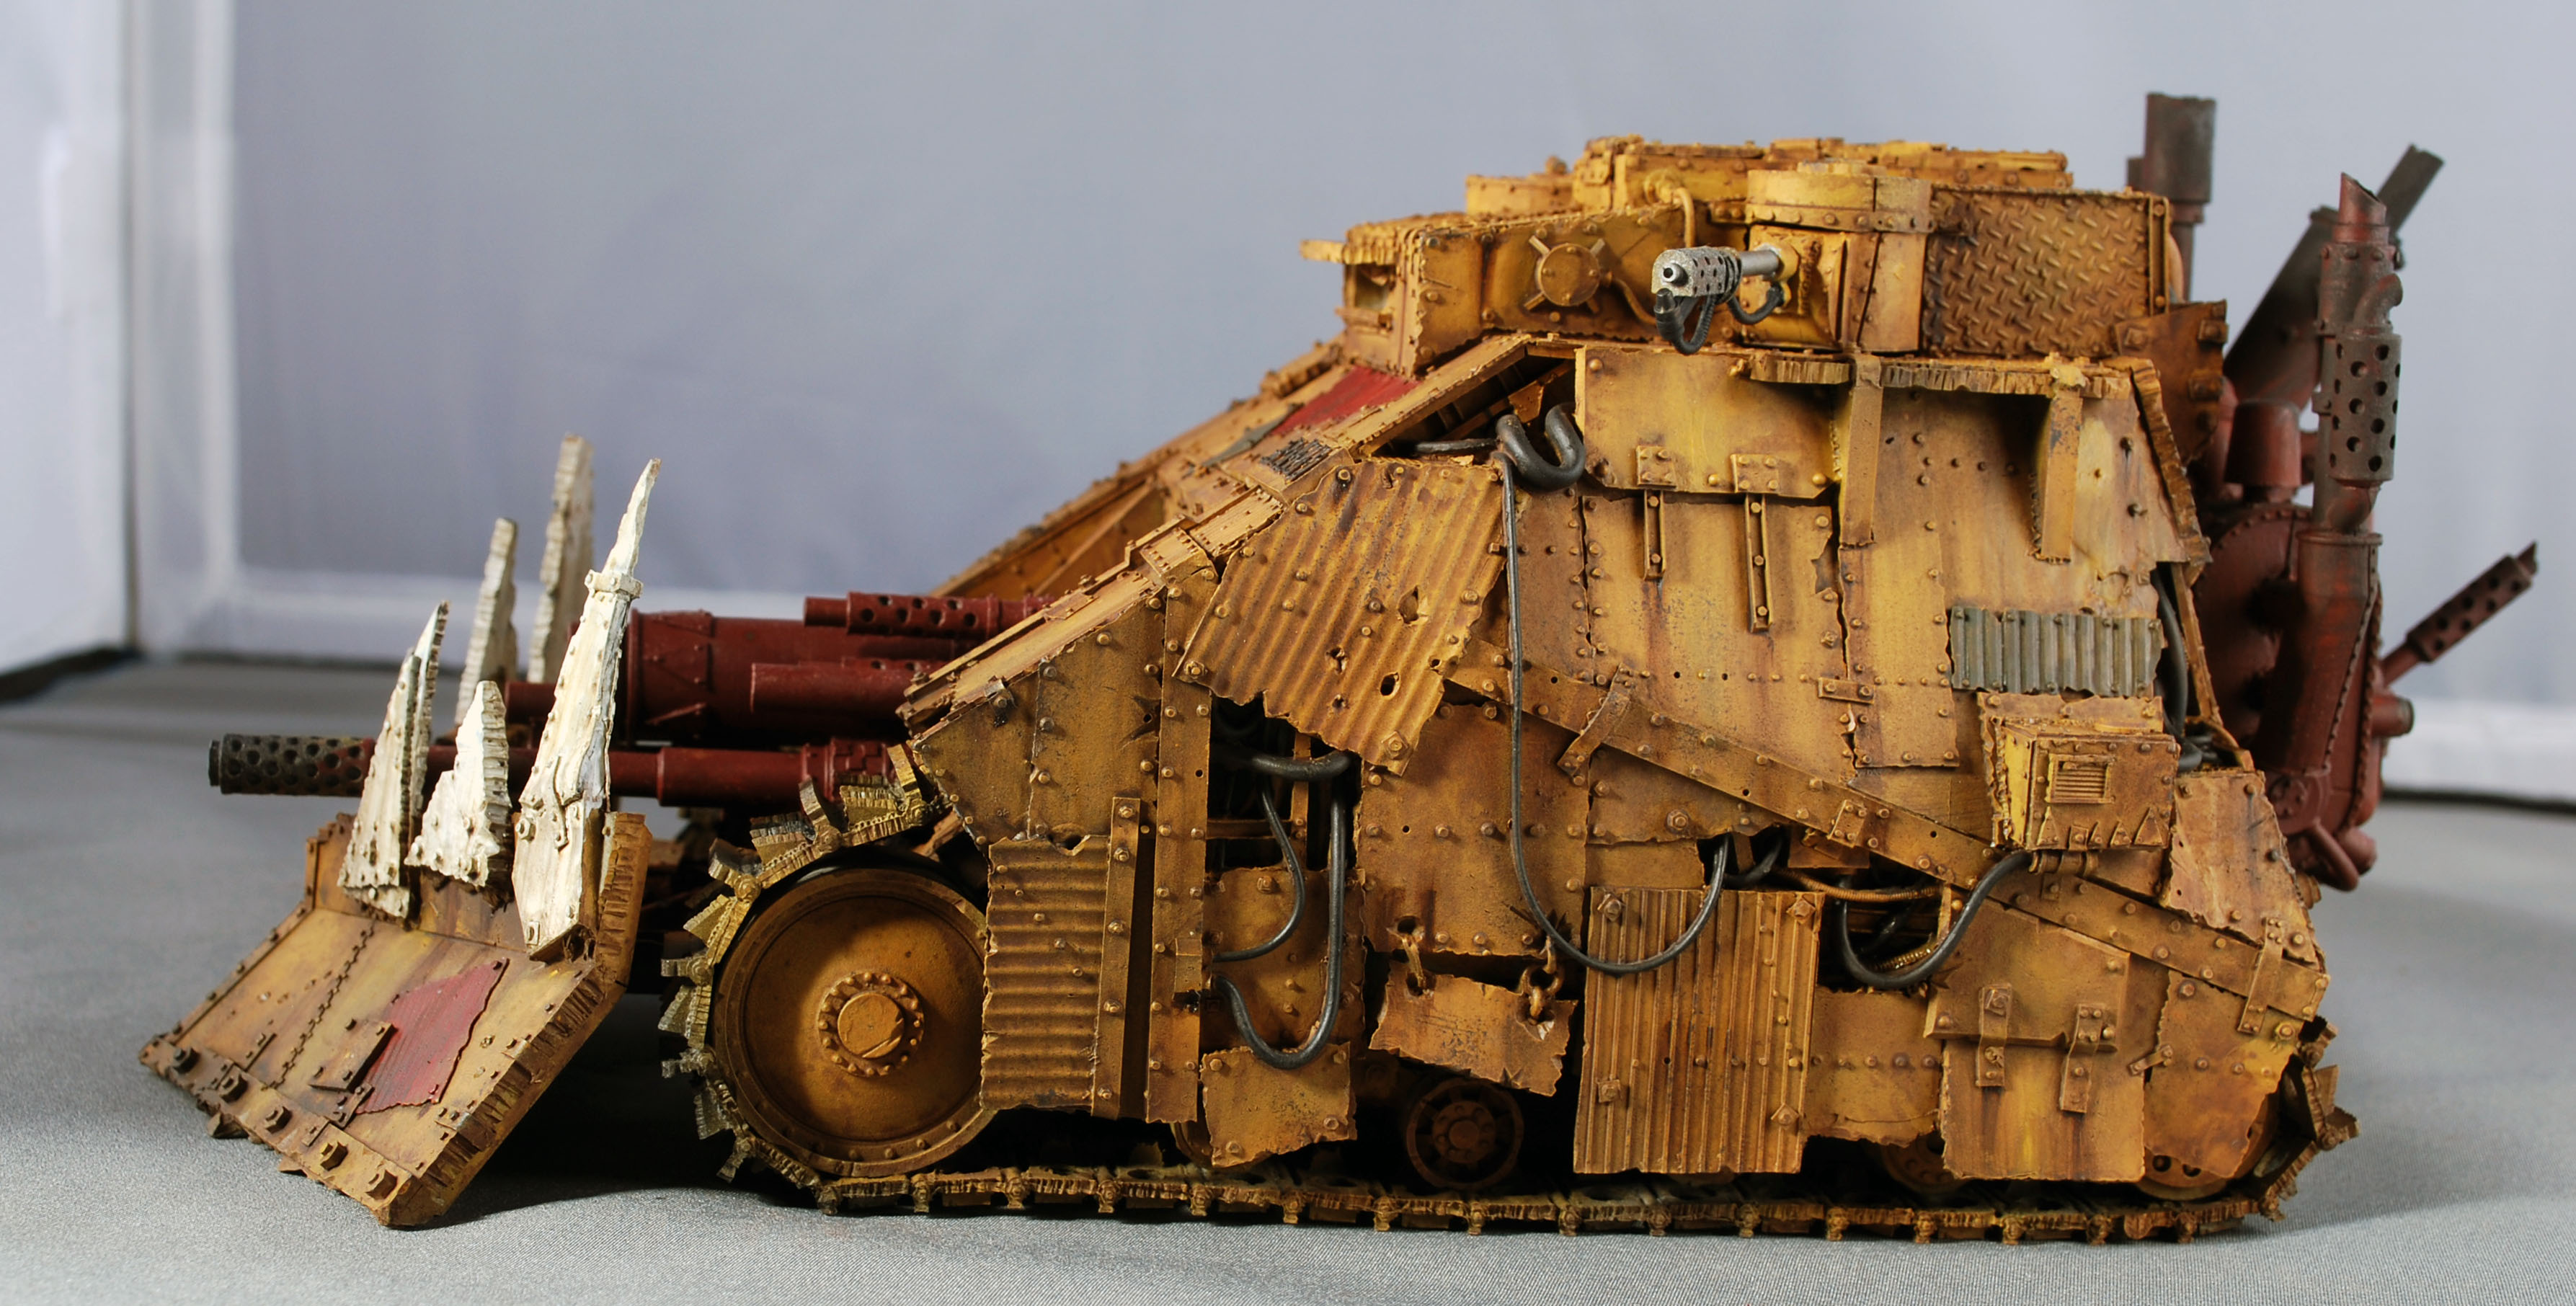
So I started with an over all coat of Mig’s brown wash.  I put this on thick and then dab or wipe it away with a cloth as its drying.  Whats nice is even once it’s dried if it looks too thick in spots you can use a brush with clean mineral spirits to clean it up.


Next up I airbrushed on Ak interactive’s Winter streaking grime.  I applied this in a bit of a patch fashion, heavier in some spots than others.  This again helps break up some of that yellow.  While its still wet I take a large flat brush and streak the paint.  This still works if the paint has dried, just not as well.

For more obvious streaks such as oil stains, I used a raw umber oil paint that I dabbed on and then streaked with a brush.

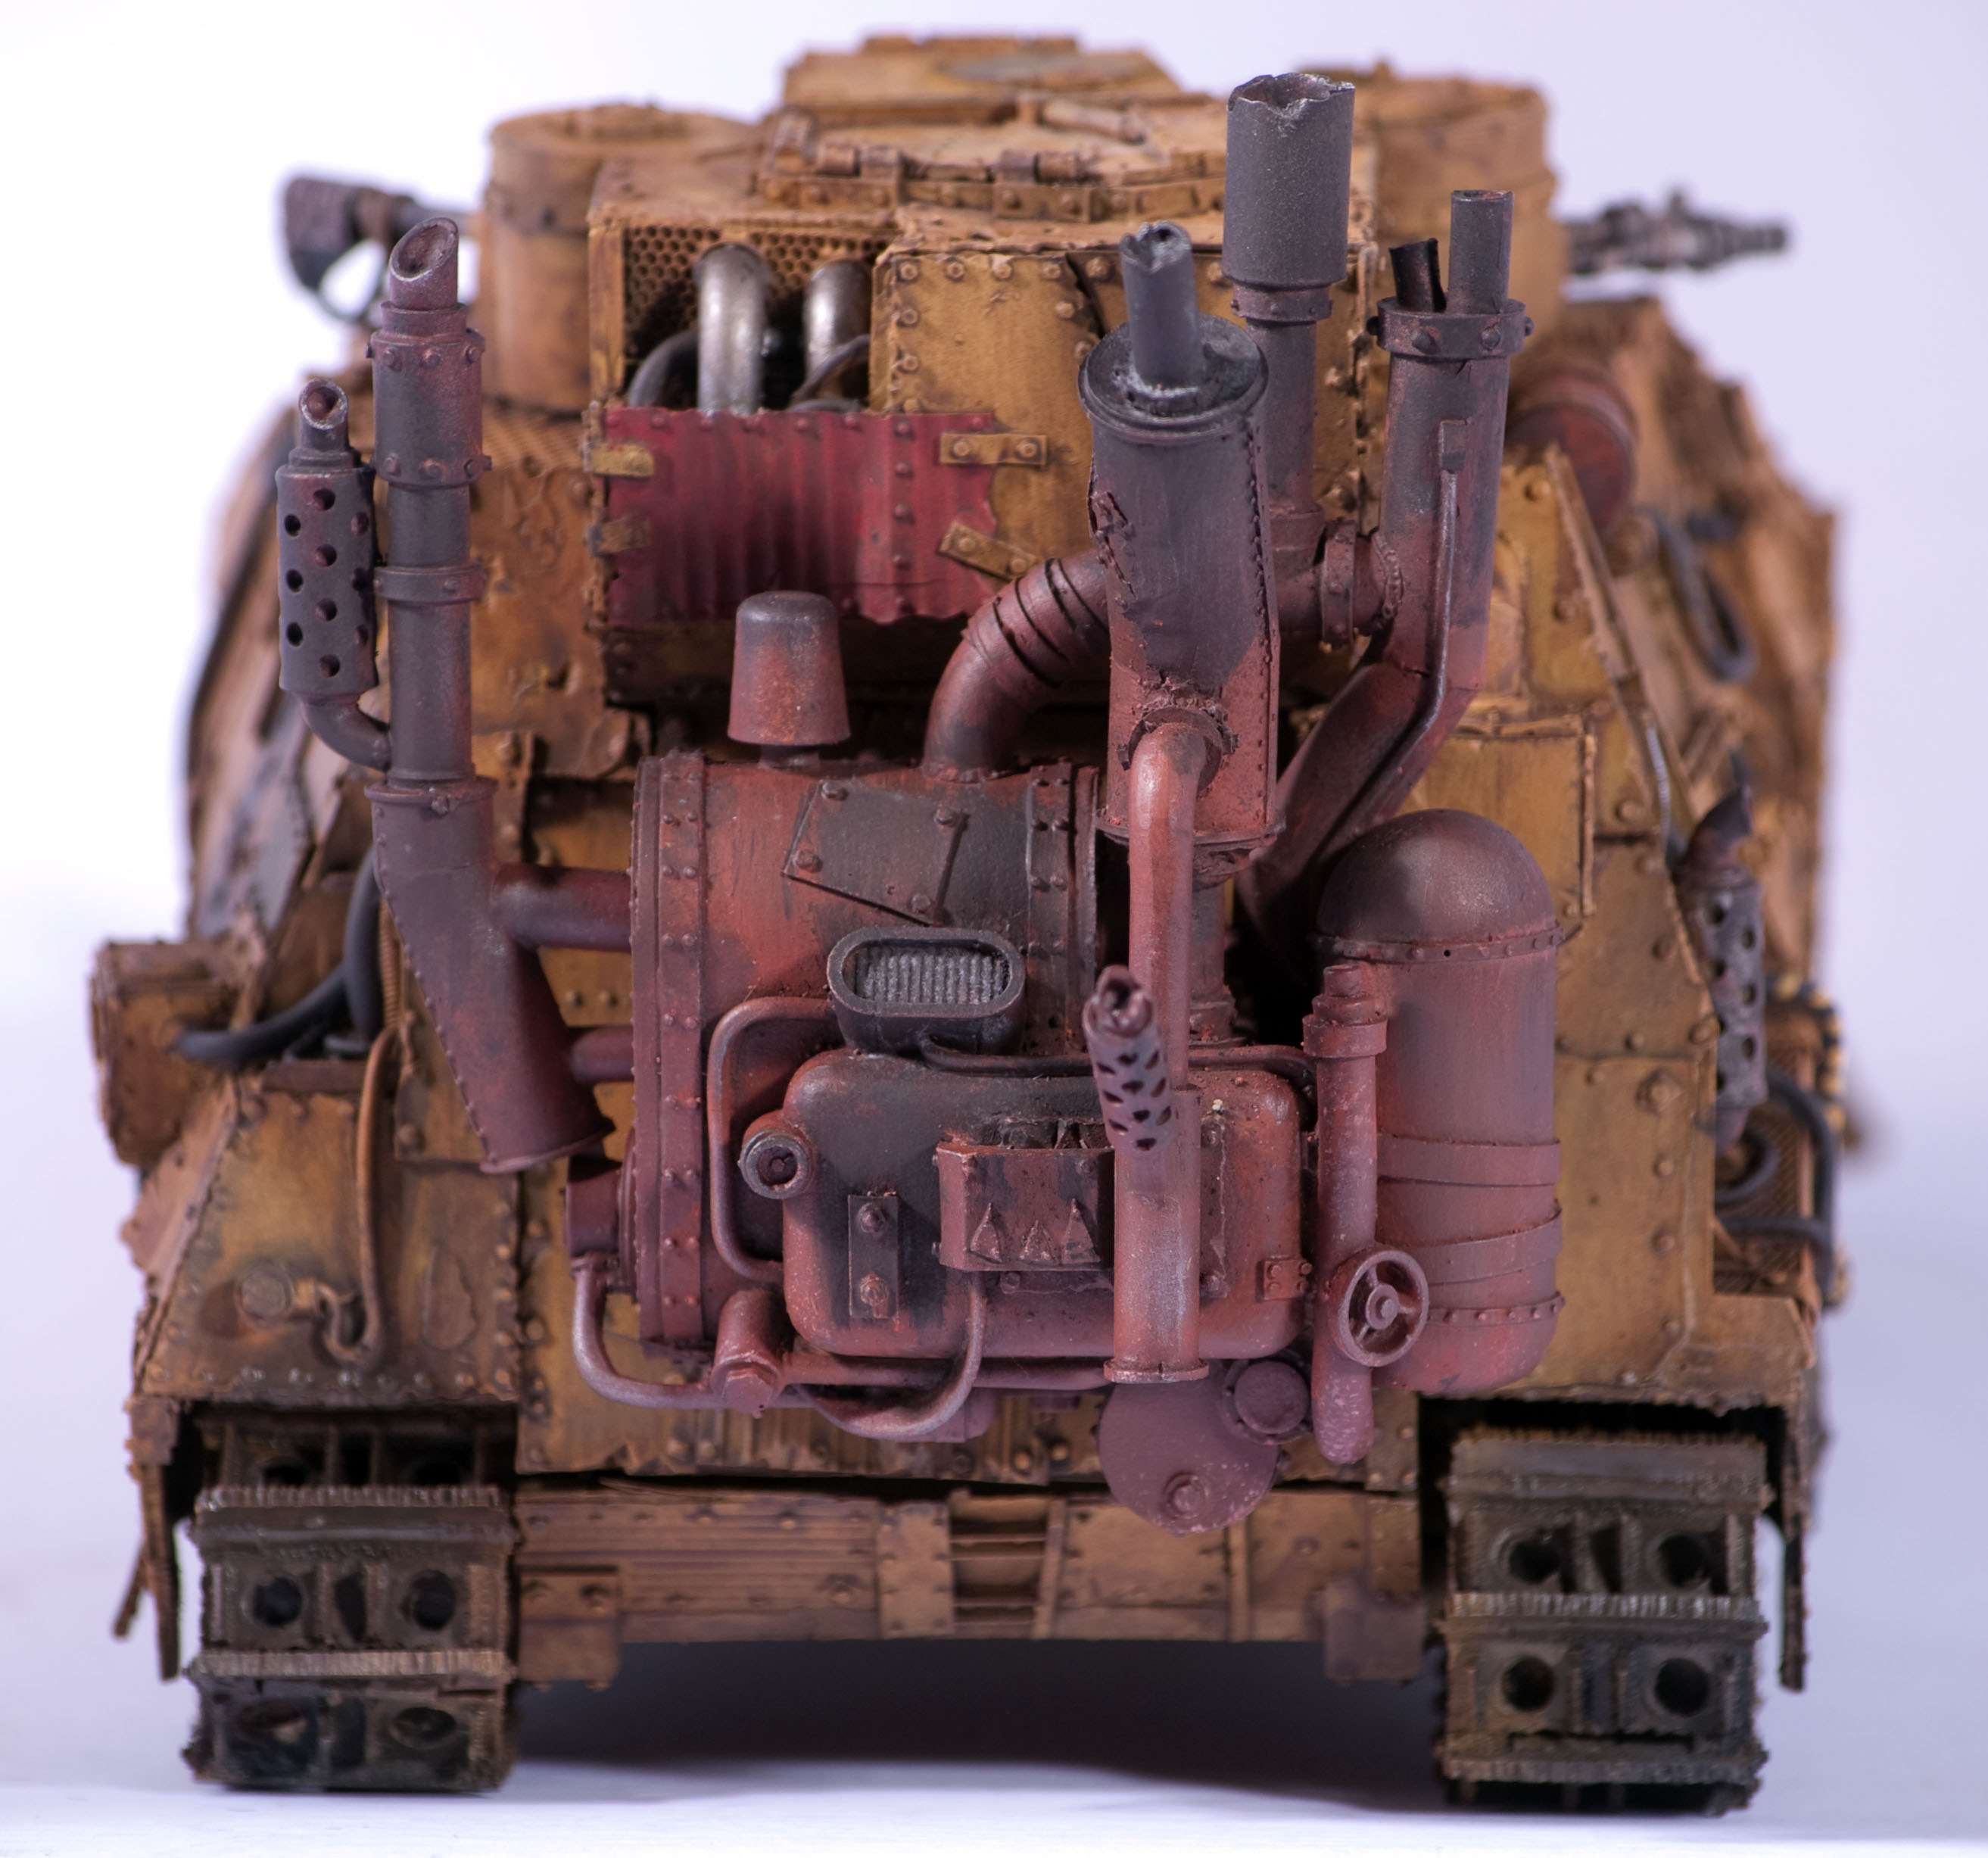
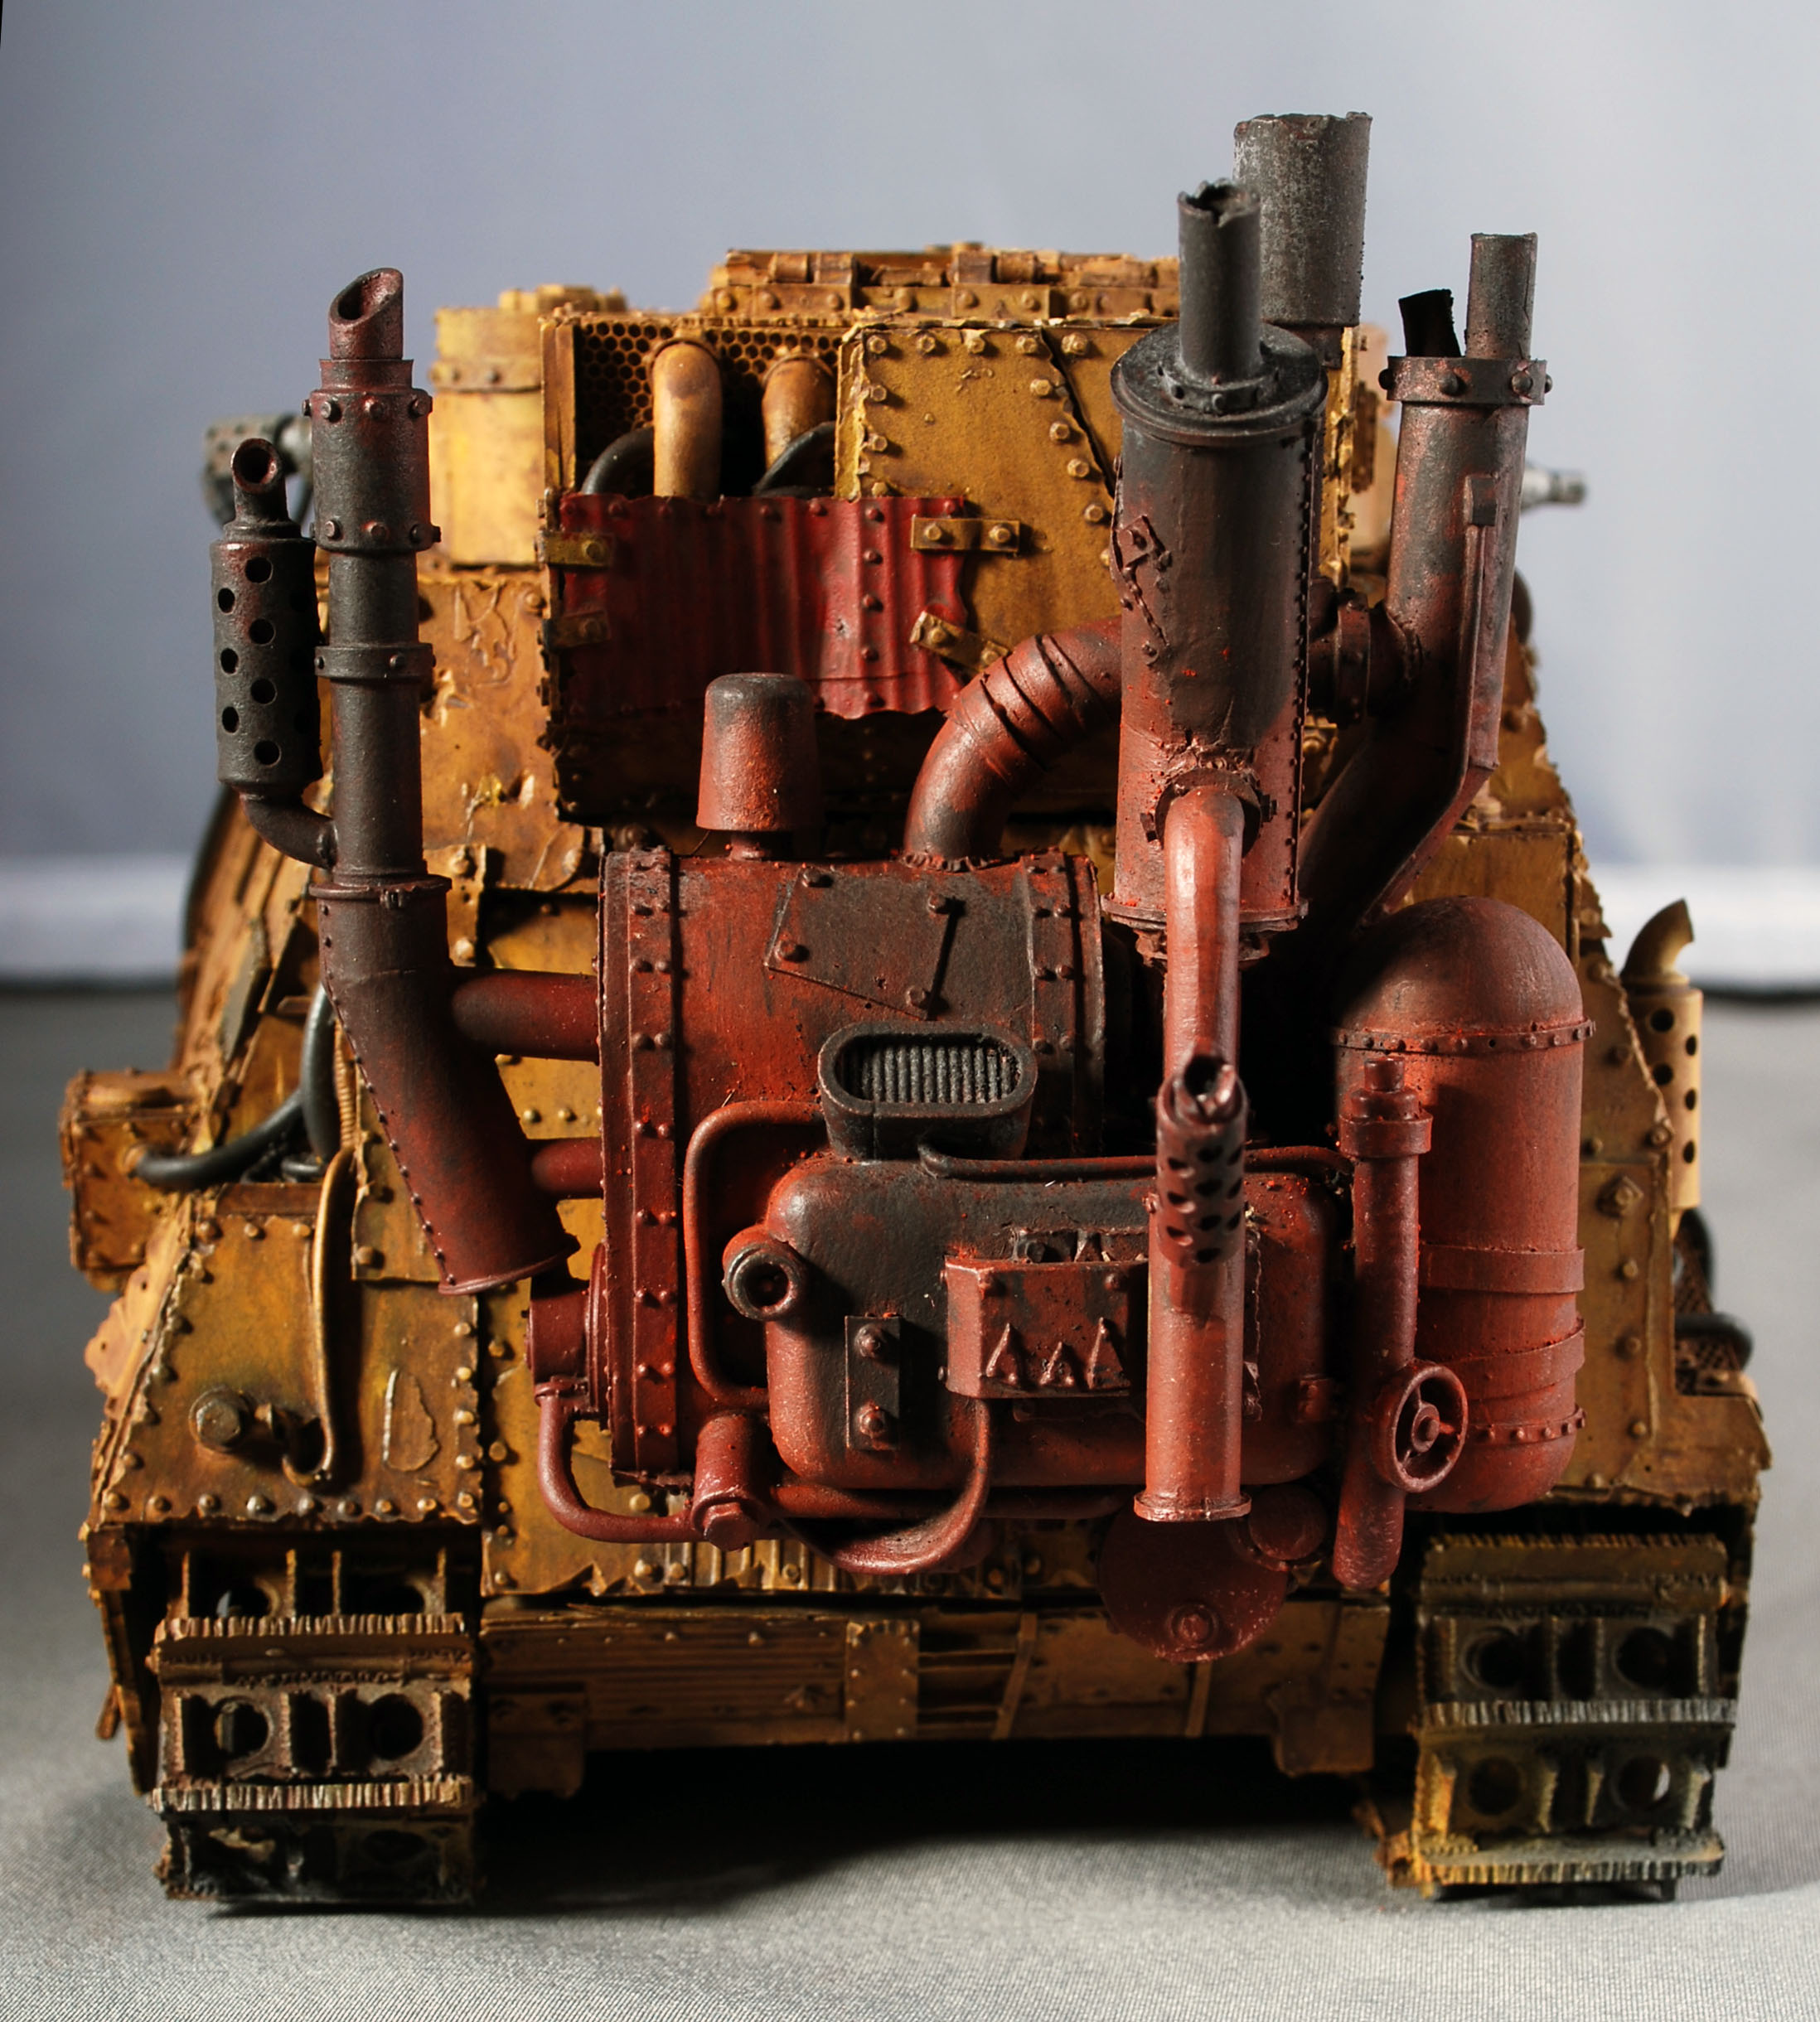
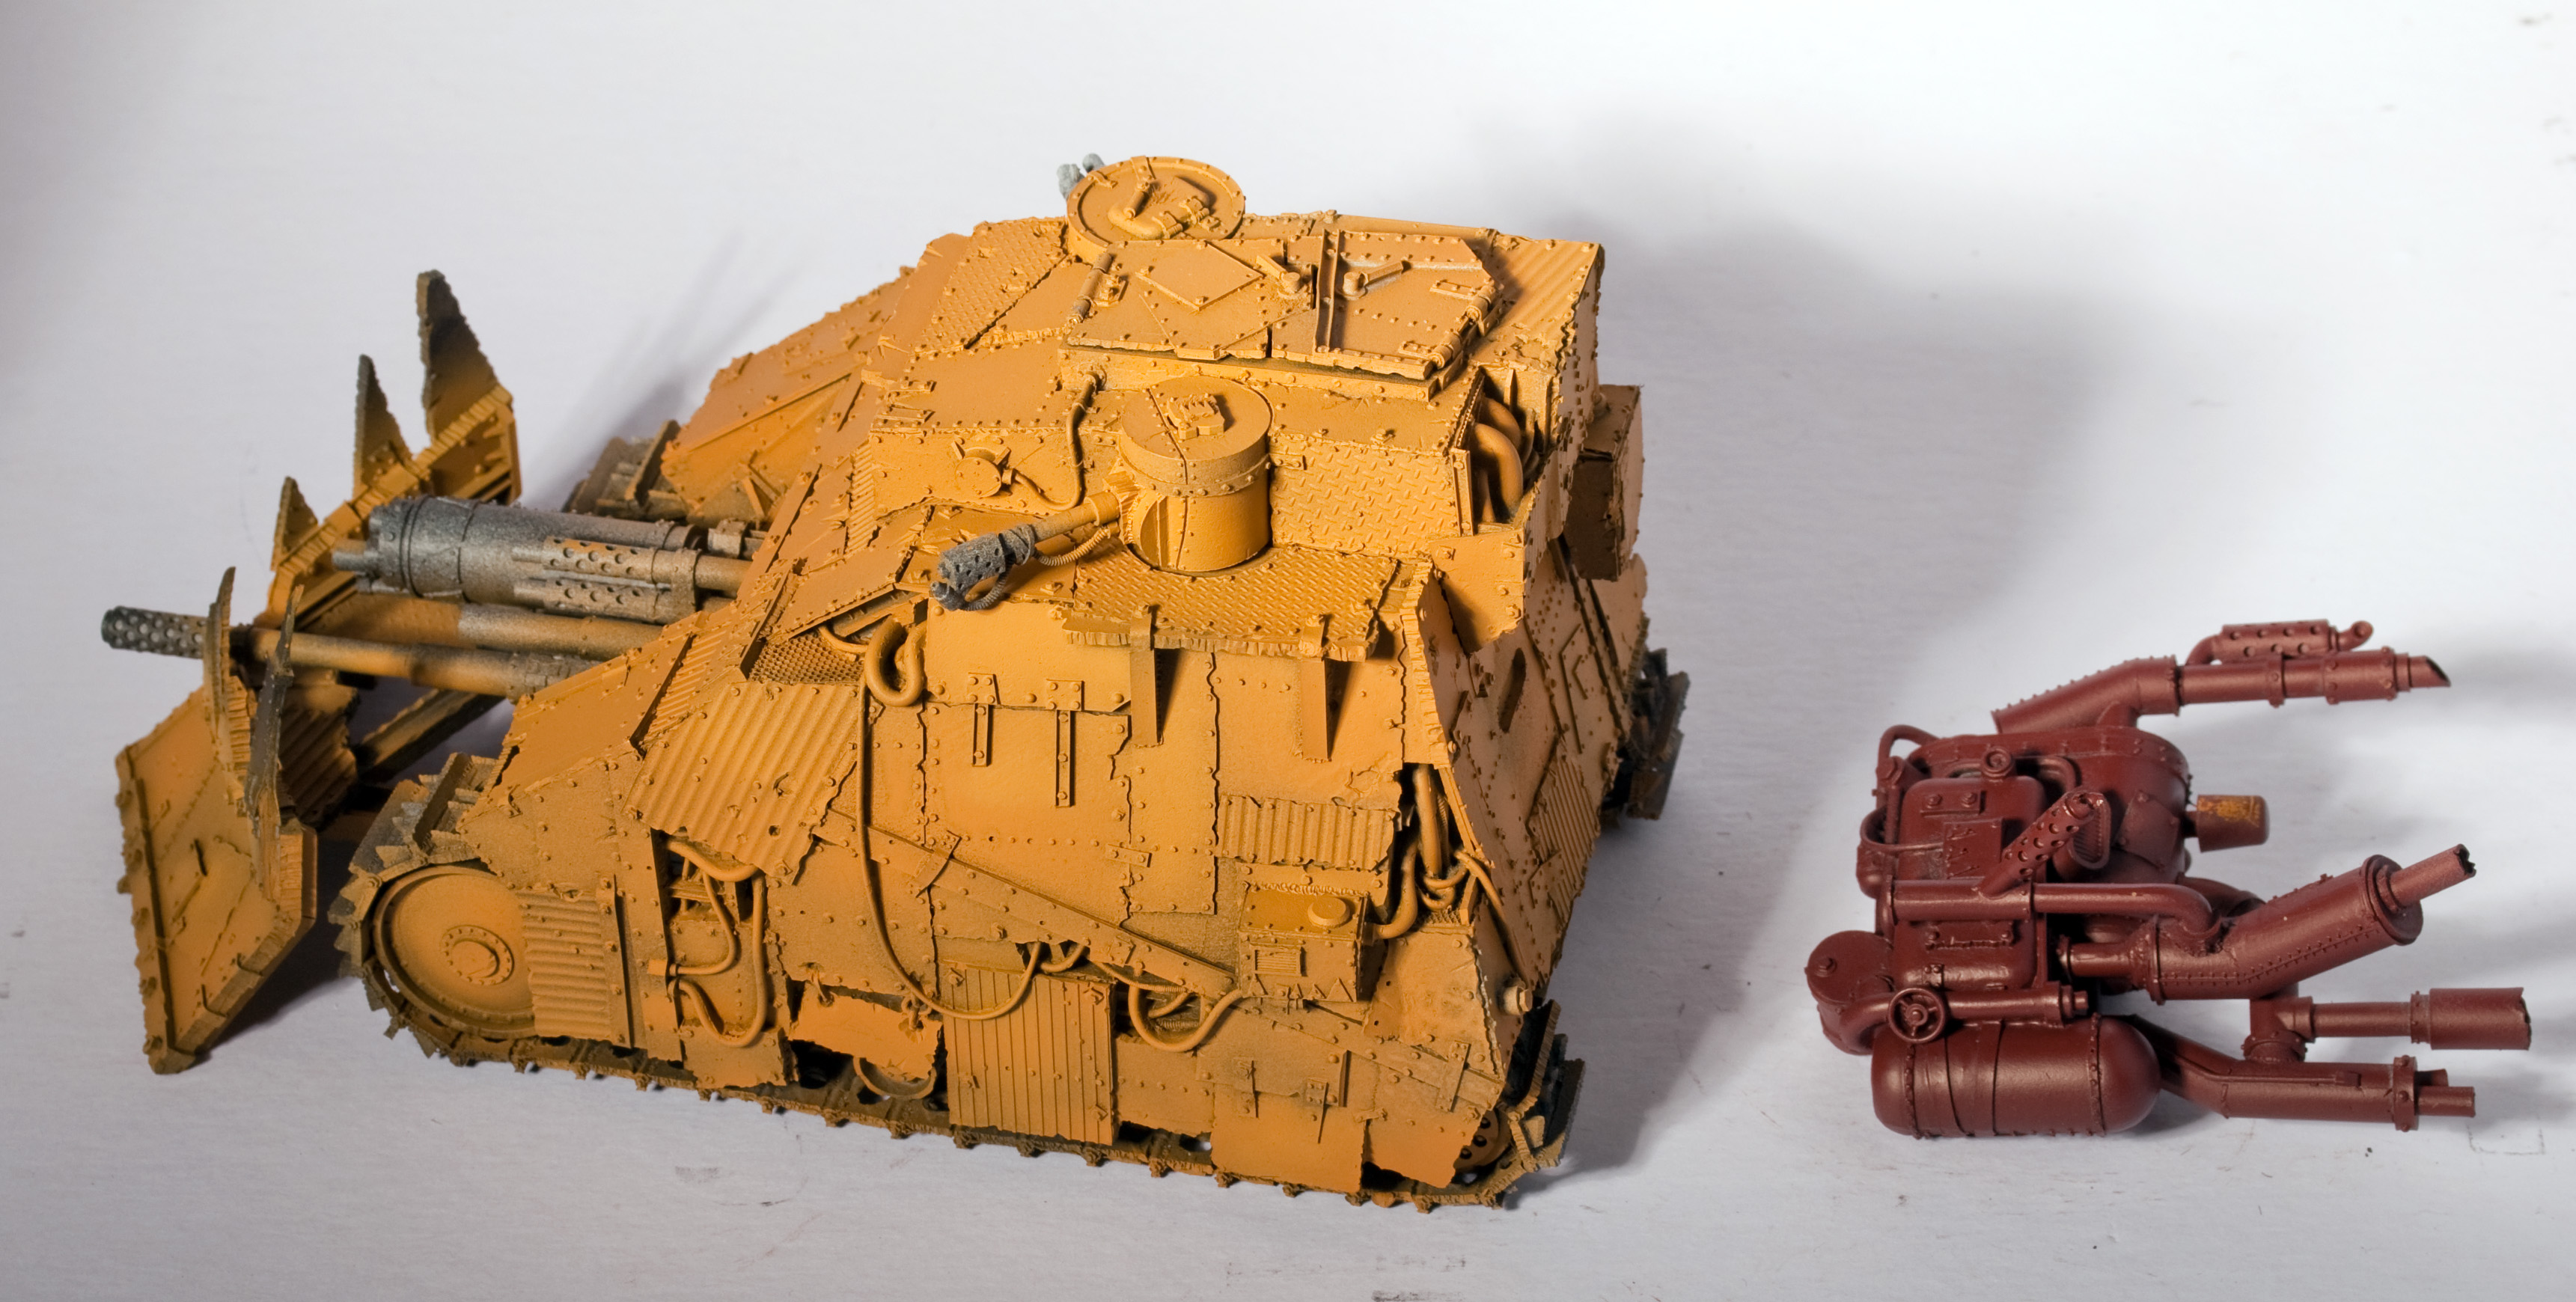
Finally for the engine I applied an overall wash I made using the raw umber and mineral spirits.  While this was wet I dabbed on forgeworld’s Orange Rust weathering powder.  Once satisfied I switched to Black Soot without cleaning the brush and started to brush the black soot over the tops of all the exhausts.  The effect gave a good look of the exhaust over the rust.

Kill blasta, my first update!

Posted: February 13, 2012 in Uncategorized

Yep, my first real update in a long time.  I’m doing quite a bit of work on super heavy vehicles for warhammer.  I figure as I have collected them over the past few years, I should finally work on them.

First up is the Kill blasta.  The build process was fairly straight forward.  6 Main parts make up the body and after that every thing pretty much falls into place.  I magnetized the weapon sponsons as well as the the top so you can remove the main gun.  This way I can interchange it with the belly cannon from the Kill Bursta kit.  The top hatches are on hinges so they can open and close.  Next time I will have pictures of the build process too.

I just started the painting on this.  I airbrushed the hull with Tau sept ochre which I lightened with vallejo’s off white to add some highlights on the top.  The engine was based with Vallejo primer, German Red brown.  This is probably one of my favorite colors currently as it makes a great basecoat for almost anything and looks great if you use it for scratches and the like.

Next update I will have finished the base coating and started the weathering.  And with plenty more pictures for you.

A fresh start

Posted: February 7, 2012 in Uncategorized

It’s finally time for me to restart this website.  I figure it needed a fresh start so I cleared out all the old posts, added a finished work gallery, and changed the name a bit.  This time it should stick.  I have lots of plans for this site but, for now it will be a place to display what I’m currently working on and give people the opportunity to contact me if they want to commission me to paint something for them.